Tuesday, March 07, 2006

The Wall #2

Progress. After a few hours on Saturday and Sunday, the frame for the wall, as you can see is completed and mounted in place. I have decided that it is a good idea to include a door in this wall due to the difficulty to open the sliding garage door when it gets stuck with all the snow under it. So, there was a little bit of redesign and a few extra joints to cut.

The only slight weather related delay this time was that I had left the wood glue outside and it was frozen solid come Sunday afternoon when I needed it again......

Sunday, March 05, 2006

Snow Blower


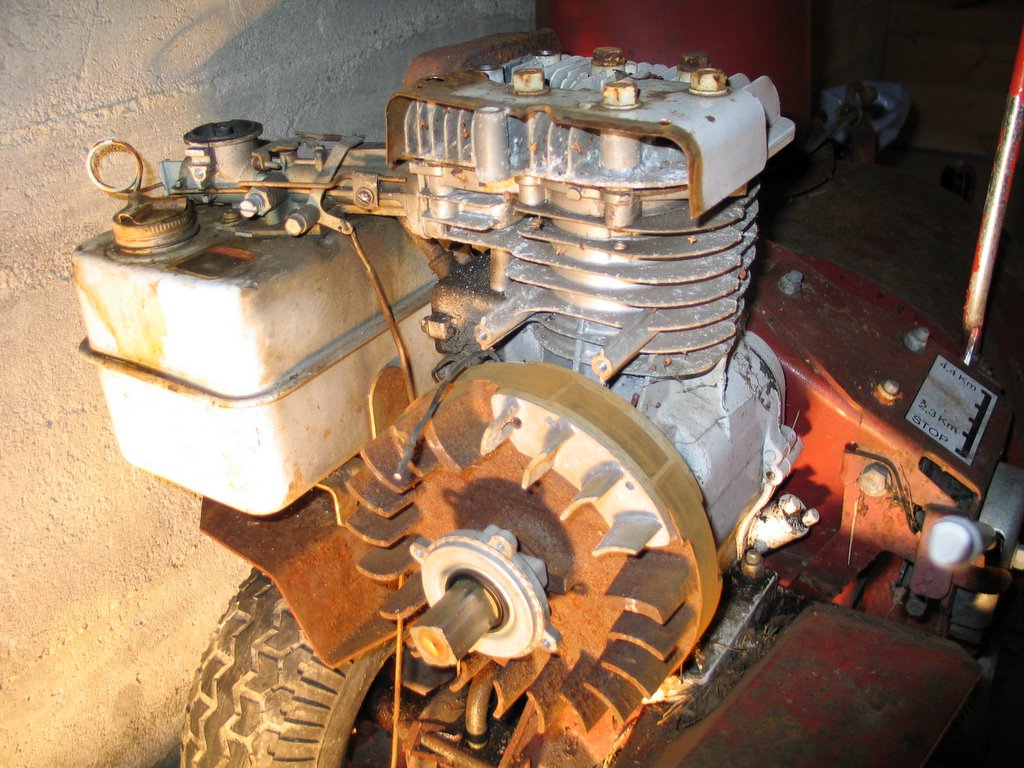
OK, it hasn't got a Turbo and it's only got 5 Happy Power but there is something deeply satisfying about working on and getting an old piece of motorised equipment up and running after a number of years lying around outside out of function.

Much to my wife's disapproval I couldn't turn down the offer of 2 non functioning, identical snowblowers which another hoarder had finally been persuaded by his wife to dispose of. I picked them up a few weeks before Christmas.

Myself and "the other cold one", who was part of the family crowds over Christmas had a couple of sessions on one of the units out in the workshop and after an amount of dismantling came to the conclusion that there was no spark and the Magneto/ignition system was defunct.

After all the Christmas chaos was over I managed to track down a local workshop that specialises in Garden machinery, old and new. I came away with 2 used Magnetos to try, a new set of points and a new spark plug. Fitted the best looking Magneto and the other bits and got a spark first time.

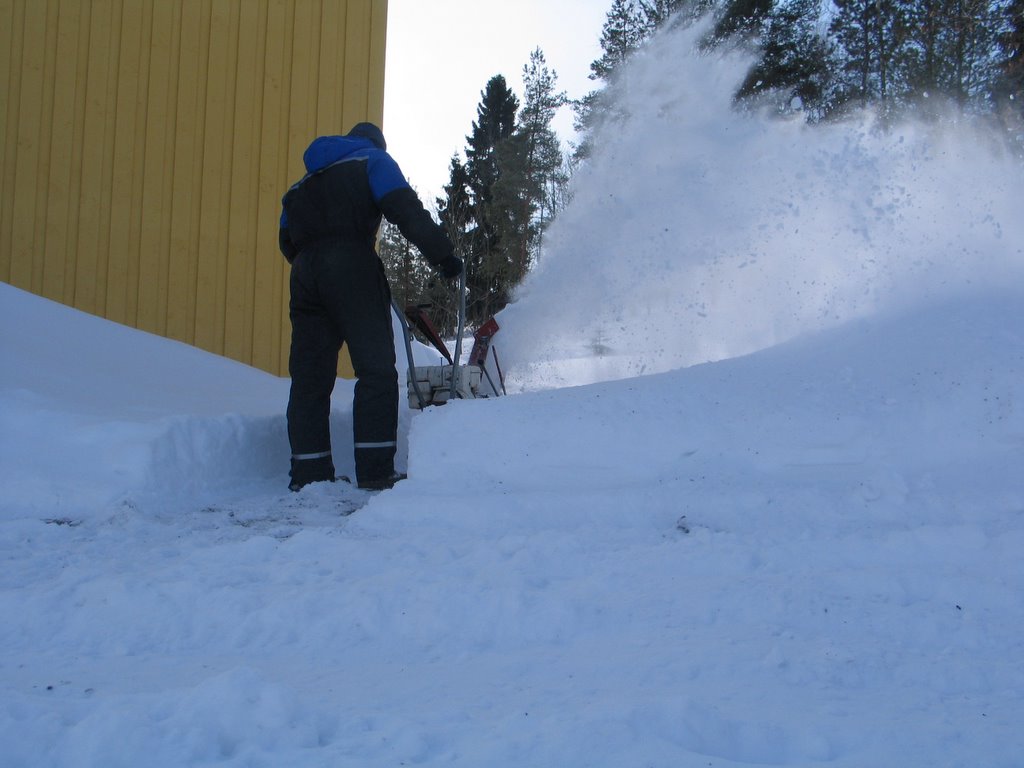
Engine still wouldn't fire so I poured a little bit of fuel into the cylinder and it fired first time, but wouldn't keep running. Pouring fuel into the carb had the same effect. So it was off with the carb, a quick dismantle and clean out with petrol, put it all back together and off it went. A little bit of fiddling with the mixture and off I went blowing snow.

Since then it's been put to good use. Hope to tidy it up a bit more once the seasons over. I'll probably give it a lick of paint and a little bit more of a service to get everything working properly (it's quite difficult to disengage the blower drum and it doesn't always disengage the wheels when you put it in stop). In the mean time, I'll cope with it as it is.

Monday, February 27, 2006

The Wall


It may seem strange to all of you out there who have struggled to repair cars in garages that are hopelessly small and wished for more space but I am building a wall, to make my workshop/garage smaller.

There is method in my madness. Where I live, the temperature does not rise above freezing for more than a few days from early December to late March. I have had ice stuck to my garage floor for weeks, not ideal working conditions. However, with the dark evenings, I see winter as an ideal time to be out in the garage. During the summer there is grass to cut, vegetables to plant, bar-b-q's to build and use and so on. When there is a meter of snow on everything and it's dark, it's either mope around inside or get out in the garage.

As you can see from my pictures, the bottom level of my barn, which makes up my garages is internally completely open and hence, impossible to heat. By separating off the left hand side (where the Landrover is in the pictures) with an insulated wall, I should be able to have a garage which sits at outside temperature and a Garage/Workshop which is insulated and possible to heat. The other big advantage is that I will be able to use my welder and angle grinder without worrying about damaging the car parked in the other half of the garage.

Progress was good on Sunday morning/ afternoon. We fetched the required wood for the framework down from the top barn using the tractor and trailer. We cut the main pieces to length, making the required joints and test fitted the frames before lunch, things were progressing swimmingly. Unfortunately, after lunch it proved a lot more difficult to reverse the tractor and trailer through the deep snow than it was to drive out of the top of the barn forward. So, instead of finishing off the framework the afternoon was spent getting the trailer wedged at all sorts of funny angles, digging the front of the tractor out of the deep snow etc, etc, etc. I intend to get my warm gear on again this evening and continue the good work, without using the tractor this time....

Updates of progress should follow in a timely fashion.

Wednesday, February 22, 2006

Operation Autograph, 2 out of 3 ain't bad.....


Thursday afternoon, a couple of weeks back, Ryan air delivered the Nikster and Sideways to Torp Airport, near our place in Southern Norway as planned.

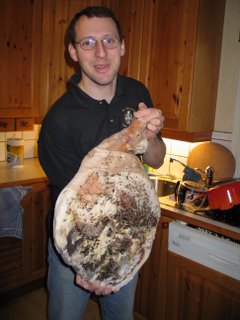
Thursday evening progressed with a bit of off roading in the snow, a nice home produced roast, a bottle of wine (or two), some aquavit (Norwegian spirit), and a few tax free beers. Very pleasant it was indeed.

All this combined with the fact that I hadn't actually packed meant that our "Early Start" on Friday morning was not all that early. The journey into and half way across Sweden seemed to take forever. The plan had been to get there in time for the last forest stage. When it became apparent that we were not going to make it we decided on the sprint. When we didn't make that either our only option was the Final service of the day after the sprint. You have to remortgage your house to fund a weekend at rally GB and a trip into service costs at least £20 a head. In Sweden, incomparisonm, a weekend pass is 350 SEK (Approx £30) and this includes access to everything except parking, which is pretty cheap all the same. So, in Sweden at least, I can highly recommend a trip to service as part of the rally weekend.

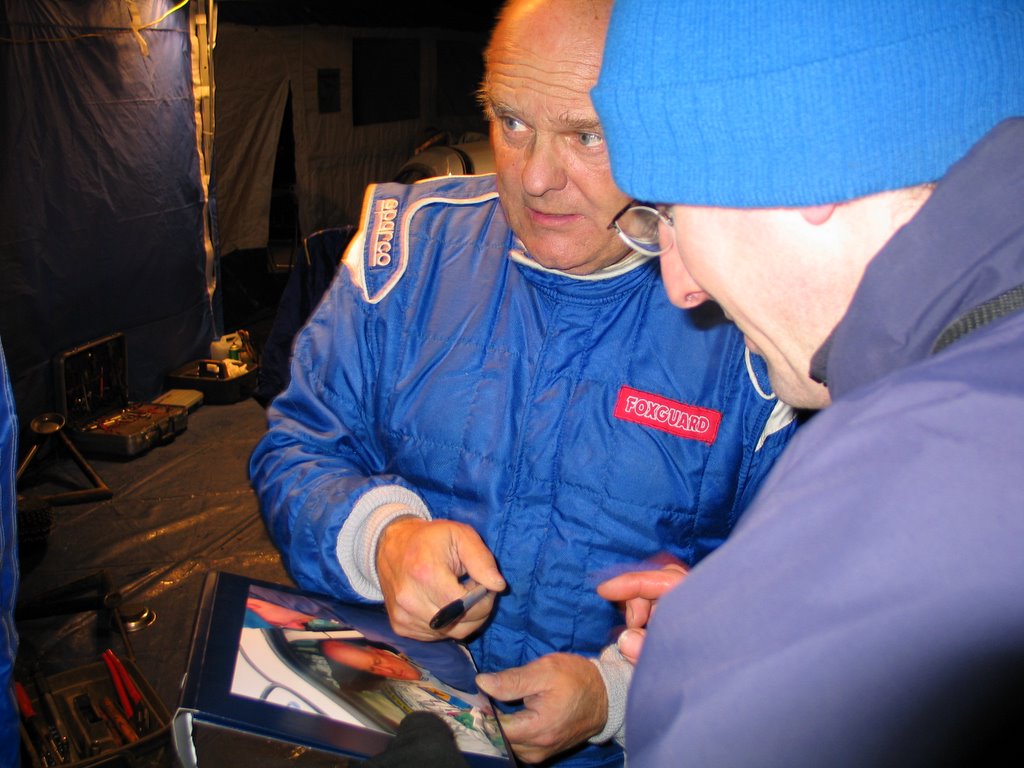
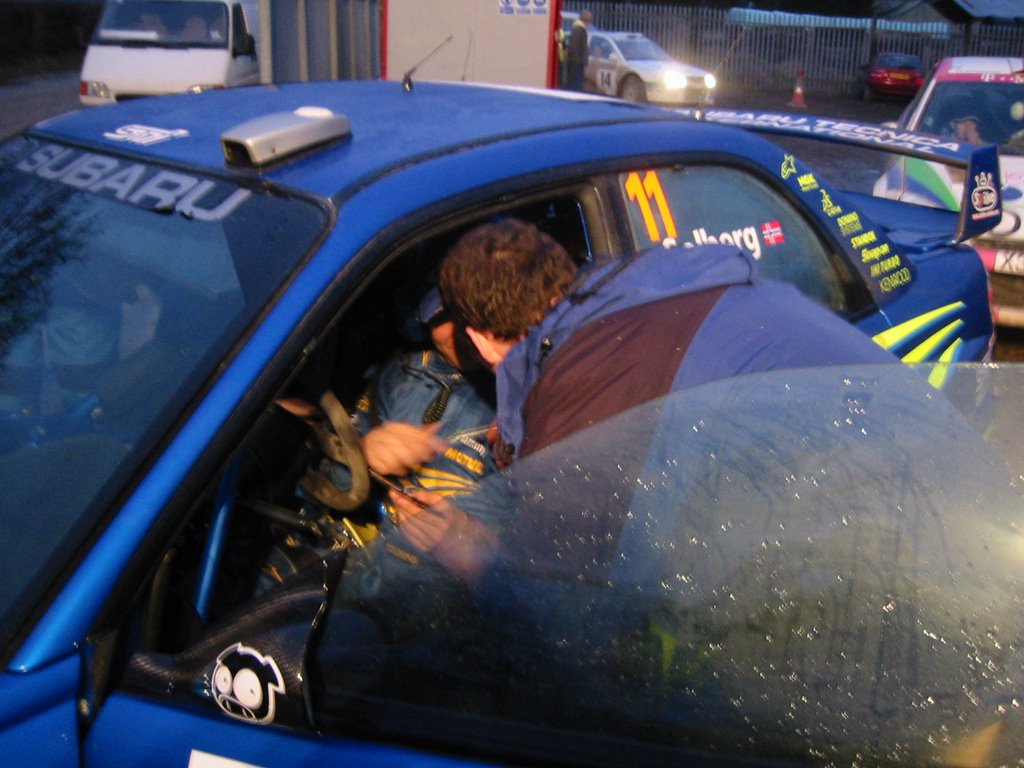
In service, you can get quite close to the top teams working on their cars and see the drivers out of the cars and helmets. You will be very lucky indeed, however, to blag autographs from the top drivers here. On the other hand, the lesser teams, such as Suzuki (Guy Wilks) and Stig Blomquist, are shoved down the far end where hardly anybody bothers to visit and here it is possible to get much closer to the teams, drivers and cars. We took this opportunity to get my photos of the drivers signinautographshs signed. Sadly Petter Solberg proved to belusiveve and on we didn't come close all weekend......

More on our weekend, with some great photos in the snow, to follow.....

Wednesday, February 01, 2006

Autographs (The Lads are going to Sweden)...


The packing list has been updated since last years trip to the Sweedish Rally, plane tickets have been purchased and Nikster and Sideways are all ready to make the trip over here to Scandanavia.

Some of the additions to last years packing list are a large indelible black pen and these 3 photos of drivers signing Autographs, printed out in a suitable large and framable format.

The photos of myself and Stig and Myself and Guy are from last years Sweedish Rally. The photo of Guy Wilks was taken just before I asked for his Co-drivers (Phil Pugh) autograph, to which the reply came "What, do you want his too, but he can't write!!!!". The photo of Myself and Petter is from the 2002 British Rally (the first WRC round that he won). I remember it well, it was the Saturday evening, before the final run of the Cardiff super special. I had a little chat with Phil Mills whilst the car was being washed. I said "Tell Petter to keep it on the road tommorrow and you've won this rally". Phil Mills replied "Don't worry I've been telling him that all day!". It's great that these guys show that they are just human and if you are lucky enough to get them in the right situation they make time for you and have a good sense of humour.

Anyway, the plan, if you havn't guessed already, is to get the Photos of myself recieving autographs signed by the respective drivers and co-drivers. To have a signed photo of a driver (especially if we suceed with Petter Solberg) signing an autograph for you must be pretty unique... Of course we also plan to get a photo of this event so then we'll have a photo of a driver siging his autograph on a photo of the driver signing his autograph, which you can be assured, if we suceed, will be published on this blog........

No doubt, if we find time there will be many photos and storys to publish from this weekends events. It's been a full year since the lads last gathered for a full blown Motor Sport weekend, so we're sure to make it a good one.....

Added After Posting
Opps, Forgot to give credit to Nikster of Petrol Art for the fine photos. See many great motoring shots including our visit to Sweden 2005 (under events) here.

Monday, January 23, 2006

Not really what I had in mind......


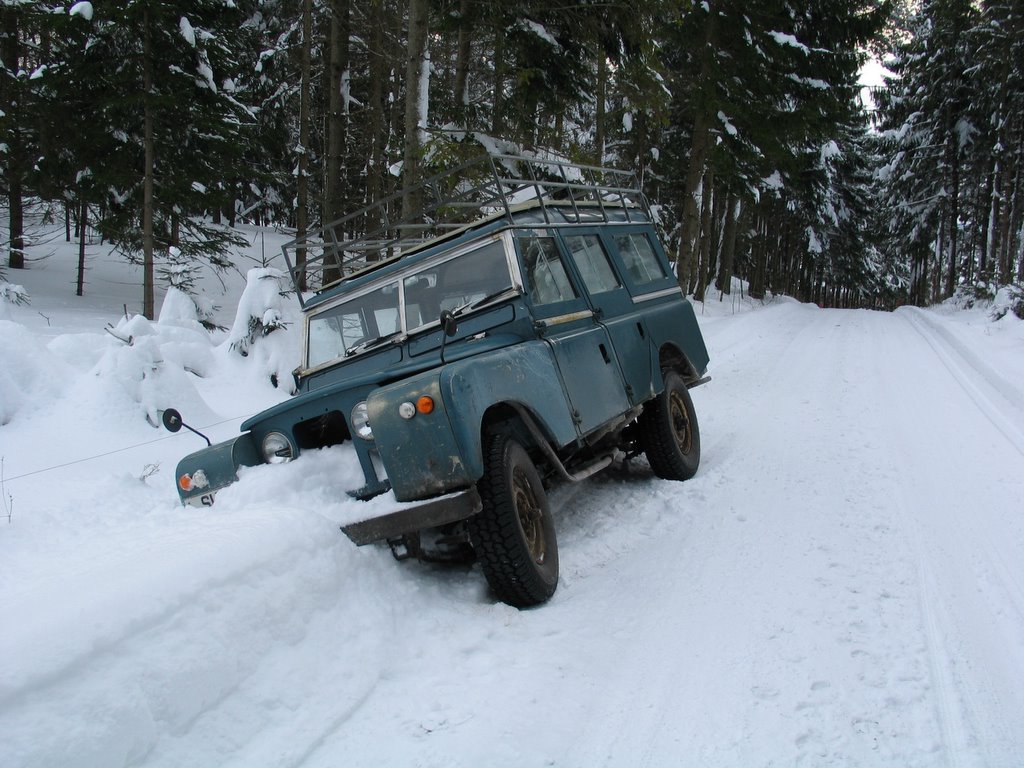
On saturday I finally had a little bit of free time so I thought it was time to get out and take some photos and put a post on Norwegian Wood about the recent snowfall and winter weather. I also thought that this was get some photos of the landy in the snow and put a post on more power singing it's praises in the winter weather. Apart from the complete inadequacy of the heater and window wipers, it's been as faultless as a 1963 Landy can be. Solid on snow and not bad on ice. In low ratio it manages in snow up to and a little over it's axles. Been very pleased with it all in all.


Having said this, it doesn't matter how good your 4x4 is, it can't compensate for driver error. I was on the way back from a successful trip to get a new magneto, points and plugs for my recently acquired old and defunct (as many of the things I acquire are) snowblowers (Hopefully the subject of another post shortly). I was on the 2Km lane way up to the house, which the neighbour does a great job of ploughing. It snowed solidly for 5 days last week so we have been very grateful for this.

However, the problem with ploughed roads and deep snow is that you can't always tell where the edge of the road is and how deep the ditch is. You can probably guess where this is going, driving up a hill, in a straight line, no cars around and in perfect control I realised a little to late that I had infact hooked my inside wheels off the road. The reason that I realised was that the 4 inch drop on the side of a road suddenly, under the snow, turned into a 3 foot ditch. As I wasn't really aware that I was off the road I drove into this hole at the sort of speed that the landrover tends to manage up such a hill.

When I realised that the landy was still the right way up, stable, unharmed, I thought "heyho, just as well I have the camera handy". Photo's galore followed by getting the shovel out the back and moving a load of snow. After a quick attempt to extract myself came the sad realisation that there wasn't enough weight on the wheels that remained on the slippy road to have enough grip to get out. Quick phone call to the neighbour, embarrasing as it was at least he got me out with his 4x4 without resorting to the tractor.

Really, the pics are pretty self explanatory.... The first is posed in the deep snow outside the house, the rest are not....

Wednesday, September 14, 2005

Lessons Learnt Present #1

so you don't have to....

Picture the situation.

Yesterday evening, I decided that instead of lying on my back on dirty concrete I would would Use the car lift at work to take the sump off yet again.

All went well........ to begin with..... as follows.

1: Drive car onto lift, no problems.
2: Raise car.
3: Have a good look underneath the engine and begin to plan.
4: Drop Car.
5: Open passenger door and retrieve bucket to drain oil
6: Drain oil.
7: Raise Vehicle, wonder why the lift starts making very strange noises about 1 third of the way up.
....
....
....
....
8: Realise through your assistants pigeon English that all is not well.......
....
....
....
....

"What happened next".... Please comment.

Before you guess, I will give you one more important piece of information. Someone had wired a pipe accross the top of two of the posts on the lift to hang parts for painting over.

Wednesday, September 07, 2005

Landrover Oil Pump Change

Ok, so it's been a while, finally My 1963 LWB Safari is back on the road, but only just...

I intend to indulge you in a "multi-post" history of the Landrover from when I first set eyes on all of it's bits scattered around an old barn in a farm shed in Cumbria to where it is today, unfinished but on the road. I But that's for later. Today, I am pleased to say, I have been able to drive it to and from work with the oil pressure light out (well most of the time anyhow).

So how did I do it.?

I started having oil pressure problems about 2 months ago. Suspecting the pressure relief spring valve, I decided to begin with a look at the oil pump. So for the first time, sump off and oil pump off. Found that the pickup was loose, set about fixing this and checked the spring relief valve, which appeared OK.

Problem not solved. Changed the oil Filter. Still no good. Took the sump off for the 2nd time and change the spring in the pressure relief valve. Still not fixed. Did change a few other gaskets (Deisel pump and sump) at the same time, which will hopefully mean lower oil usage.
Gave up with cheap bits and decided to change the oil Pump.

On Tuesday evening I halled myself out of my sick bed to conduct procedure as below.

1: Drain Sump into very clean container (as oil will be reused). Be very careful not drop sump plug in oil.
2: When the sump is drained, re-insert sump plug to stop dripping. Drop Sump plug in oil.
3: Undo the 24 Bolts that hold the sump in place.
4: Remebering that it is heavy and if it has not been taken off for a while it will be stuck in place, carefully remove the sump. Advoid this landing on you head.
5: Carefully flatten the retainig tabs on the oil pump reatining bolts.
6: Undo these, and remove oil pump. Again, this is heavier than it looks. Avoid it landing on your head, and remember that it will have an amount of oil in this. Wipe this of your face before proceeding.
7: Attach new pick up to new oil pump. Spot that the pick up pipe is shorter on the new oil pump than the old one. Think nothing of this, it is a new part after all.
8: Install new oil pump, attempt to keep this clean and grit free during whole procedure.
9: Clean all grit from gasket, and gasket surfaces and remark to yourself that the sump is indeed heavy whilst you hold it in place with one hand whilst trying to arrange the gasket and screw a couple of bolts in with the over hand.
10: Install the 24 bolts holding the sump in. Tighten all of them 3 times in a paranoid attempt to be sure you got all of them.
11: Wipe clean Sump, engine, chassis and front propshaft of oil and muck so that you can identify future leaks.
12: Try to pour oil from bucket back into engine with a dodgy old funnel.
13: Allow funnel to fall down side of engine whilst half full of oil.
14: Swear.
15: Repeat 11.
16: Test. Be very pleased that you get oil pressure, be not so please that you only get oil pressure on the flat and uphill.
17: Reflect on the difference in length of the new oil pick up...... Nuts.

Time Taken: 1Hr 20 Mins
More Power Job Difficulty Rating: 6/10 (5/10 by the third time you've done it).
More Power Job Enjoyability Rating: 2/10 (Not the most pleasent of jobs).

Simple then, hopefully, it'll be sump off one more time, swap to the old pick up on and that'll be that.

Thursday, August 25, 2005

The lads visit Quadmania Scotland

The lads at Quadmania
3 weekends ago the lads were dealing with the matter of "The Stag", in preparation for this past weekends big event (Which more will be written on as there was very much a car theme to the Niksters wedding).

Of course, due to the "law of the stag" we are not at liberty to reveal many of the finer points of the weekend, but one thing that we can include is a review of our trip to Quadmania located near Dunoon in Scotland.

The Saturday morning activity was the 2 1/2 Hour "Big Quad ATV Trek". After very detailed instructions on the use of the quads, we set off teamed up with the other groups that were out for the morning. We were taken up, down, across and so on round a field at a disappointingly sedate pace to begin with "to get the feel of the bikes". Then we set off on the trek, still together with the other groups.

Just as it was beginning to seem a little dull, we separated from the other groups and set off on our own. Immediately having to hang ourselves off one side of the quad to stop it from falling into the pond which dropped sharply to our left, then swinging sharply to the right down a steep incline into a stream. "Brilliant" we thought. The rest of the trek followed a similar vein, with alarmingly steep inclines up and down on both grass and narrow paths, some medium-high speed sections and some "technical off road".

Needless to say there were some comedy moments. At one point, there was a shake of the head by the instructor and a comment asked of my being a bit of a "throttle jockey". Also as we stopped for one break, (Sideways) Matt couldn't contain himself, jumping off his quad and shouting "You can get them very sideways", unfortunately, the ex-marine instructor was none too pleased with this remark and made it quite clear that sideways was not an appropriate direction of travel. Our cards were marked, didn't stop us though.........

The afternoon activity saw us dressing up in rubber and getting to terms with a spot of "gorge walking". Despite some of the party worrying themselves nearly to death and enquiring of the validity of there life insurance in event of injury from such event, this was thoroughly enjoyed by all. Not a typical lads activity, but the opportunity to muck about in a 6 Deg C water brought the kid out in all of us (o.k. some more than others....) as the group made it's way up the steep and narrow gorge through the Scottish forests.

All in all, Quadmania, comes highly recommended from "The lads". Professionally run, nice people, a good mind for safety but at the same time understanding that people are there to enjoy themselves. See Norwegian Wood for a review of our choice of acommodation in Scotland.

Monday, August 15, 2005

Hammer Burns

Whilst working on my land Rover yesterday evening, I managed to burn myself on my hammer.

Now, I can admit to many hammer related injuries but this was a first even for me.

How, I hear you ask.... Hooge spotlight standing on wing of Land Rover, hammer about 2" directly in front of said spotlight. Move spotlight and rest arm on hammer, which by now is, of course, red hot.

Tuesday, July 26, 2005

The Cars, the Blog

Follow three lads, with a common interest in the automotive world, through their lives journies with all things petrol (and one or two diesel....) powered.

See our efforts to keep our vehicles on the road, make them faster (or just get them to go in the first place), better, cleaner, dirtier, stop the oil coming out, get the oil out..... You name it we've tried it and normally failed at the first hurdle.

Keep up with the fast moving progress of our restoration projects. Well, maybe the pressure to write an update might encourage us off our backsides and into the garage.

Get pictured reports from motoring events around the UK and the world, from the comfort of your office, we'll do the hard work so you don't have to.

With more-power, the blog, you can expect tales of success and failure, pain and pleasure, profit and (mostly) loss but hopefully no tales of divorce. Amazingly we've all avoided that one so far. Probably because only one off us has actually bothered to get married already.... But that's all changing with a forthcoming long weekend enjoying three hired Caterhams, oh and a wedding.