Wednesday, July 04, 2007
Got My Wheels Back
Got my Spitfires wheels back after they were shot blasted and powder coated. 500,-Kr a piece (£45 ish). Very pleased with the results, another part of the puzzle complete.

Sunday, January 07, 2007
Project David Brown #2
The first week of the new year has seen a flurry of activity. The Wall in the garage is finished and 2 extra sockets are installed and wired up.
There's also been more progress on the old David Brown, albeit, not all of it positive.
Since the last report I continued by taking the sump off for a good look from underneath, not so good, rust in the bores under the pistons as well. A quick scrape with a screw driver and a polish with 800 wet and dry cleans the rust off OK and leaves the bores looking pretty good. Typically one can't get to the bores under the piston.
Next step was filling the pistons with penetrating oil. This didn't help much and only found it's way past No.2 the other 2 remaining dry underneath.
This evening I plugged in the engine heater and, to my pleasant surprise, this works a treat and heated the block up so that you could hardly touch it. Still no joy.
Facing the inevitable, I have removed all three bearing caps with the intention of pushing each piston out on it's own. All shells and the crankshaft are in good condition so, hopefully these will be re-usable.
Working from underneath with a block of wood and a large hammer I have managed to remove no 2 piston, Good... No.1 and No.3 are still stuck solid so I still havn't been able to rotate the crank even the tinyest amount, bad.... With a little careful persausion I managed to free up 2 of the 4 rings on NO.2, these look to be OK, with a little more persuasion, I managed to break the third ring on No.2, Bugger...
So the list of parts required now looks like this.
1: Head Gasket Set
2: New Rings
3: Sump Gasket
4: Clutch
Understandably my financial controller has reservations about my using large amounts of cash on this project. I wil be trying to avoid adding too much more to that list.... More pictures at the next report.
Thursday, January 04, 2007
Project David Brown #1
New Year, New Goals.
Stunned by the fact that I was up, had eaten breakfast and was not significantly hungover by Midday on New Years Day, I thought that I might as well get straight out in the barn and make some progress towards one of this years aims.
I am quite sure that my 1971 David Brown, Select-A-Matic 880, 2.5L, 3 Cylinder Diesel tractor would prove very useful in this years gardening plans. For this reason I really want to get it going by mid spring. This will be easier said than done as the engine is seized solid.

I have been aware that the next step was to get the head and sump off the engine and see what the state of affairs is. Assisted by one of our new years party guests, and with a bit of a struggle we finally persuaded the head to separate from the engine by tea-time on the first.
What we found, was both good and bad, the state of the bores suggests that they are the reason why the engine is stuck due to a significant amount of rust binding the piston to the bore. The good news here is that it could be something much worse.....

Sunday, November 26, 2006
Fleet Maintenance.
I'm writing this partly for your interest and partly as a reference for myself of all the jobs that popped into my head as I was driving the tractor down to the petrol station to fill it with Winter diesel earlier today.
Today I managed to tighten the loose ball joint on the Tractors steering so that it now doesn't swing widly from side to side every time you hit a bump. The castelated nut was too far in and hence the split pin did not stop it from loosning. A couple of large washers sorted this out. I also found out where the coolant was leaking out of. I think I fixed this and I filled the rad up with anti-freeze. I also gave the lawn mower a quick brush off and clean and removed the battery for winter storage in the basement.
It's a long list, and some of these jobs won't be started until next summer, but here goes.
The Opel
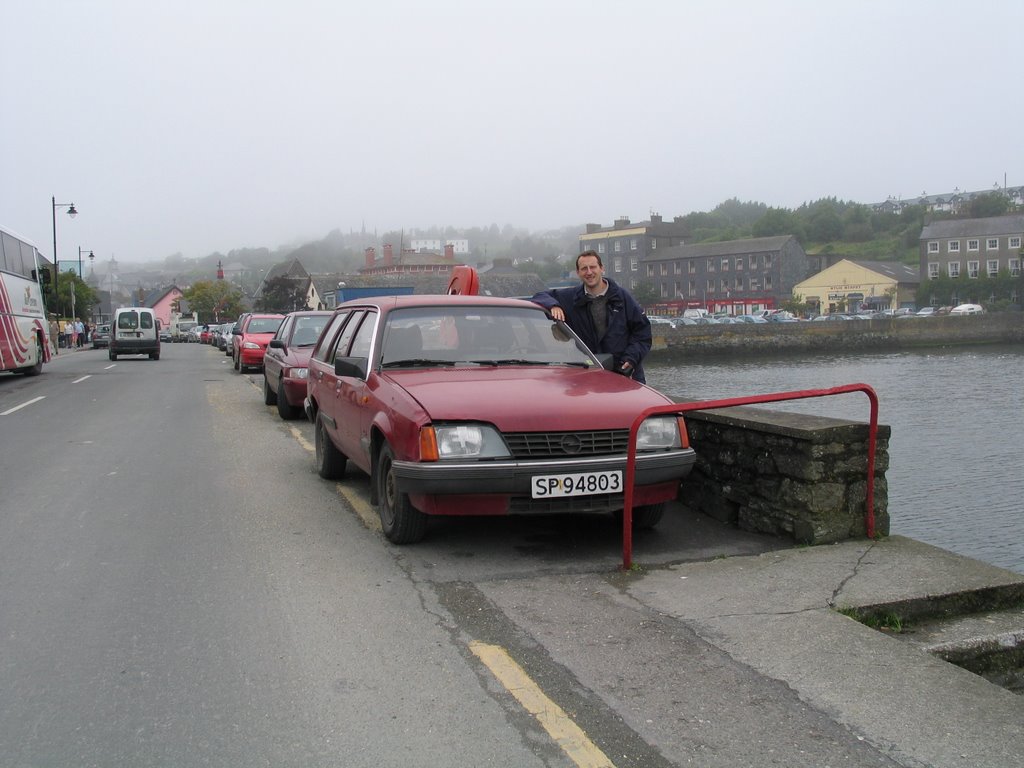
Pretty much up to date with servicing and the rest, a few small jobs really.
- Replace the bonnet cable (again) so that you don't need pliers to open the bonnet.
- Get a new clip for the drivers side window winder. I lost the old one whilst I was fixing the door handle.....
The Landy
Plenty to do here, mostly because we havn't really finished restoring it yet (even though I've been driving it for the last 2 years!!!). There's a few service type jobs too. Planning to use the Landy through this winter and then take it off the road for a little while next summer (whilst I'm using the Spitfire.... Yipppeee).

Service Items...
- Purchase and install New dipstick, the old one broke.....
- Fix Sidelights, they've got water in them and don't work most of the time.
- Fill grease into all grease nipples.
- Clean Injectors, it smokes a little too much when it's cold.
- Get new springs for the wiper arms so that they don't lift off the windscreen at 50 mp/h
Longer term...
- Treat inside of Chassis with Dynax S50.
- Clean and re-paint/protect outside of chassis members, as there is already some surface rust showing.
- Paint front wings
- Remove the bits of body which don't fit properly, make them fit and attach them permanatly.
- Rub down all of body and spray a couple more coats of Top coat.
- Attach missing door trims.
- Replace passengers door after accident with 4 post car lift
- Install Door Seals
- Mount front grill
- Sort out interior and seats.
Tractor and Trailer.
Since moving in over 18 Months ago, I've been using my Zetor 7245 quite often and I have, ashamed to say, really negleted it's maintenance needs.

Tractor
- Oil change
- Change/clean all filters, oil, air, diesel, hydraulic fluid and so on.
- Fix the heater valve (was leaking so I've had to bypass the heater)
- New windscreen wiper blade.
- Fix demister
- Find out where the brake/clutch fluid dissapears slowly to and fix.
- Fix hydraulic leak.
- Find out why oil drips out of engine and fix.
- Replace all water hoses.
- Fix lights (most of them, half of them don't work).
- General Clean and tidy.
- Fix temperature gauge (or maybe it needs a new thermostat).
Trailer
- Fix Hydraulic leak.
- Straighten bent light mount, change broken light cluster and make lights work.
- Grease as required.
The Triumph
The plan here is to complete this over the winter so that it is 100% ready for the first days of Spring, as soon as the sun is shining and the salt is gone from the roads.
It's out and driving, but there's a fair bit of body work and interior left to do. a very quick summary here, I'll try to catch up with my project updates shortly...

- Finish body work (bonnet, doors and boot lid)
- Change Windscreen
- Interior
The David Brown
Other than towing this undercover, discovering the 3-cylinder deisel engine is seized, taking the injectors out and pouring deisel down the bores, we've not got any further with this either.
We plan to focus on the garden next year and the bucket of the front of this would be very useful, so the plan is to do the bare minimun to get it usable before next spring.

Sorry about the rubbish picture, it's the only one I could find, from the estate agent, taken before we bought this place. The David browns now tucked in a corner with all sorts of stuff in front of it and hence is not so Photogenic at the moment!. Expect Photo updates when I get working on it.
Before Spring
- Persuade engine to rotate
- Persuade engine to run
- Assumming sucessful in above, change clutch.
Longer term
- Restore.... Paint, New hoses, new glass and so on.
The Lawnmower
Again, for the last 18 months we've just used this and not really given it much attention. The price of new ride on Lawnmowers is rediculous so we really need to look after the one we've got. Not much to do really.
I don't seem to have a picture of the Lawnmower, but it's pretty much like any other basic ride on jobbie.
- Oil Change
- Wash
- Top battery up and charge it fully before storing it in the basement for winter.
Snow Blower
Last but not least on our list of Internal combustion engines. I got this as a spares or repair before last winter, got it working and made good use of it. I reckon it's really good, Mrs VL, reckons it's too noisy and heavy to use!!!!

Before the snow comes!
- Check it still runs, we've had no snow yet this year!
- Oil change.
- General Lubrication/greasing.
Longer term
- Restore/Paint.
- Fix clutch so that it always stops when it's supposed to.
- Fix the wire/handle that rotates the spout.
Plenty to do, I'll try to fit time in to post updates as I work my way through these tasks!!
Wednesday, November 08, 2006
Oil Change
As those who know me are aware and those who don't have probably guessed, I am interested in all things mechanical, regardless of age, speed, power, function and so on.
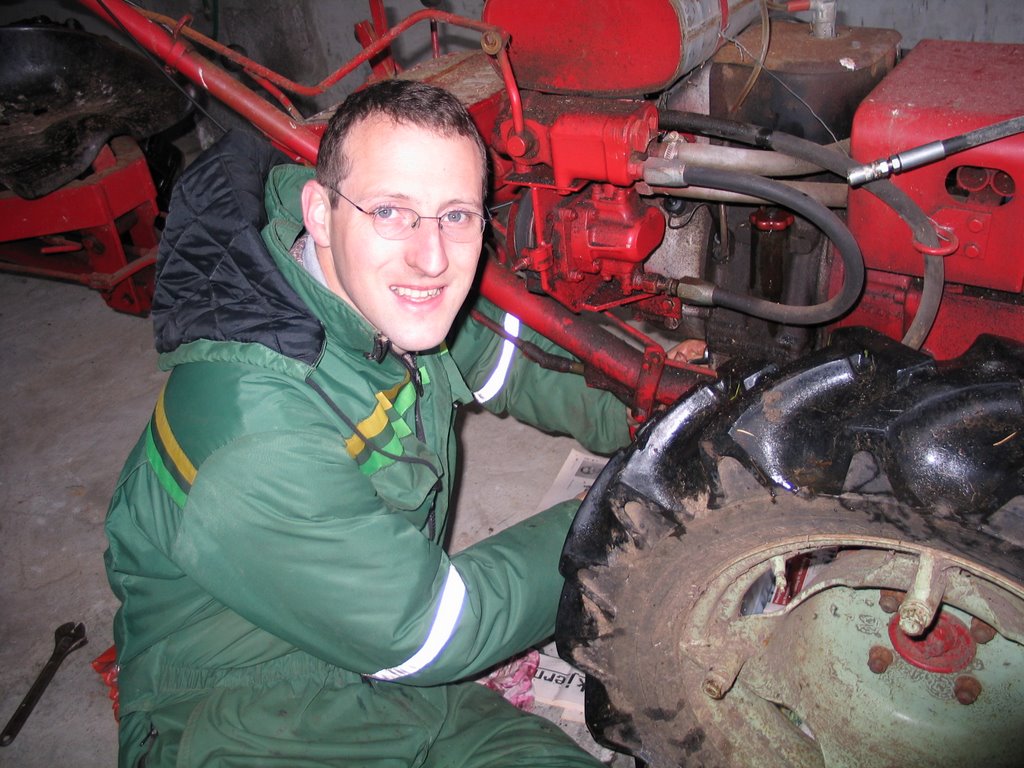
Whilst I am still playing catch up with the Spitfire project reports, I thought I would come right back up to date with last weekends trip to Mrs LS Uncles farm on an Island outside of Bergen on the West Coast.
The farm and the farm machinery is not new to me as I lived there during my first 6 months of our time in Norway. Mrs VL's uncle is house bound and the farm is mostly held in control by some sheep which are grazed on the land. For this reason the last time this very peculiar tractor was used was by myself together with Mrs LS and "the thoughtful scotsman", 18 months OK, to assist us with loading the 7.5ton lorry we used for moving, as seen here.

First job of the weekend was to chop up some large trunks with the chain saw (also not used for over 18 months, started first time) and to fetch these up along with a few other piles which the Sister in Law had already chopped up by hand. So we trudged down through the inevitable mud and found the tractor exactly as we had left it in the bottom of the barn. Did all the normal checks, fuel, oil, clutch still went in and out, brake pedal and lever still moved freely. On opening the fuel valve fuel leaked out of the top of the carb, probably a bit of muck, which I hoped would clear once we got some petrol flowing into the engine (as indeed it did).
I got the starting rope out the little tool kit, wrapped it around the main pully and gave a gentle tug to make sure the engine stil turned, not really trying to start it. "Put, Put, brrrrr", it fired into life first try.
We got our hands on some suitable oil, drained the old stuff out,

filled the new, found out how little it took, drained some of the new back out again so that it wasn't over filled,
found a grease gun, greased the umpteen grease nipples and gave the whole thing a good clean.
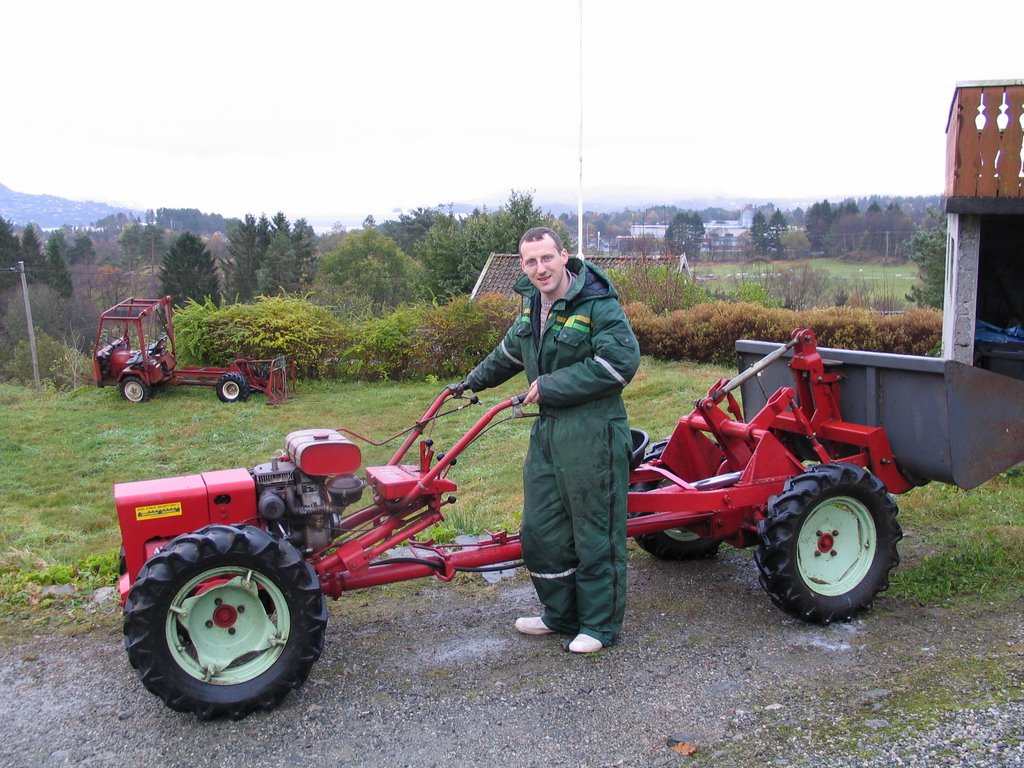
Leaving it ready to be put into good service for the weekend. Mrs LS's Uncles wet and hilly litle farm is really suited for such a vehicle. A real full size tractor would make such a mess.
Tuesday, November 07, 2006
Project Spitfire Update #3
After the dissapointment of not making the date for the test, a new date was booked for the 29th of September. At the same time we arranged hood fitting for the 25th so that the car would have a test run before the test and that we wouldn't be so reliant on weather on the big day.
After our trip to England and Ireland in the Opel I had a weekend concetrating on other things before getting back to the spitfire.
I had arranged for a mate to come and help for the Saturday before the big occasion. Before this I had completed the following,
Re-wired and tested the overdrive.
Changed the reversing light switch and got them working.
Sorted out the fuel tank sender wiring, which I got worng such that battery had discharged.
Attached the front quarter valences and got the sidelights and indicators working,
and charged the battery....
Two of the main jobs for the Saturday were to fit the tunnel and to sort out the Carbs, which were still a little bit sticky and tempermental.
As typically happens, my assistent was assigned what turned out to be the days most difficult job. This was drilling/cutting the neccesary holes and fitting the new fibreglass gearbox tunnel. No way near as easy as we first thought.
It took concentration

caused mild insanity

but in the end fitted nicely.

We also corrected the incorrect fitting of the wiper mechanism, fitted new wiper blades and then got those working. At the same time Mrs LS worked on the hood frame, which by now was in component bits.

The next, and again not as easy as expected, job was to fit new seat belts. These took a bit of figuring out and were a little fiddly to get right but in the end we got them to fit.
At the end of a long day we were tired but satisfied,

and felt justified in allowing ourselves the pleasure of a little test drive.

The Carbs had to wait for another day (which meant again we were starting to run short of time). Another update later (who knows, maybe the blog will catch up with real life shortly)....
Saturday, September 30, 2006
Project Spitfire Update #2
After a huge amount of time spent on the body, way more than we had expected as always seems to be the way with body work, we were way behind plan.
Our test was booked for Thursday 17th August, with a 2 month waiting list you have to book in advance. I'll pick up the story on the Saturday before the big day.
Bodywork wise, the situation looked like this

The underside had been primed, painted with a stone chip protective layer and then painted with the blue 2x top coat. The inside was primed and I had started some filling/prep on the outer panels.
Mechanically it was as below,

pretty much as per the previous post but all rear suspension components were more or less ready to install and the engine work was also pretty much completed.
Body wise, I arranged some "hired help" for the Sunday and the Monday evening, 2 guys well experienced with body work and prep so by the Tuesday morning the body looked like this,

ready for painting.
In the mean time my wife cleaned the gearbox

and I reconstructed the rear suspension, complete with new wheel bearings which were changed by a local garage as I don't posess a press.

Tuesday was a frustrating day, the high build primer which was supposed to be on the body by 10 o'clock wouldn't flow from the gun and the compressor I had couldn't keep up. More details of the nightmare I had painting can be found here on The Club Triumph Forum. In the end, again way behind the days plan, I got it all painted with the primer and looking pretty good.

During the few hours the primer needed to harden I got the chassis on 4 wheels for the first time and with some help drafted in we got the engine and box hoisted up, rolled the chassis under and dropped them into place. One job that went well.

I then installed the propshaft and by the time that was completed we were ready to start flatting the body work, this went relatively quickly and with 2 compressors joined together spraying the top coat went relatively well, although finishing at nearly 1 o'clock in the morning was far from Ideal.
Bright and breezy the next morning (Wednesday, 26 hours before the car needed to be road worthy...) we were all ready to re-unite the body with the chassis, which we wheeled out in the sunshine,

so that we could wheel the newly painted body on it's trolley into the garage.

We carefully attached the body to the ceiling and using the 2 chain blocks I had borrowed from work raised it up off the body trolley and high enough to wheel the chassis back under. This whole procedure went well and remarkably enough, all the neccessary holes in the body lined up with the captive nuts in the chassis. Seems we achieved something during all those drunken weekends in my old garage in Cockermouth...

At this point, the photos dry up and about 14 hours of frantic bolting back together ensued. I had assistance during the evening and into the early hours from a mate, and despite extreme tiredness good progress was made. Whether the tiredness and late hour was a factor in the cracking of the old windscreen during installation is a point for discussion.
Not wanting to accept the inevitable truth that the car was not going to be driveble by 10 a.m. the next morning and ever the optimists it was back out of bed at 5:30 am, less than 4 hours after we had hit the sack. Everything continued to take more time than expected and the deadline came and went. However, out of pure stubbourness we were still going to drive the car on the same day.
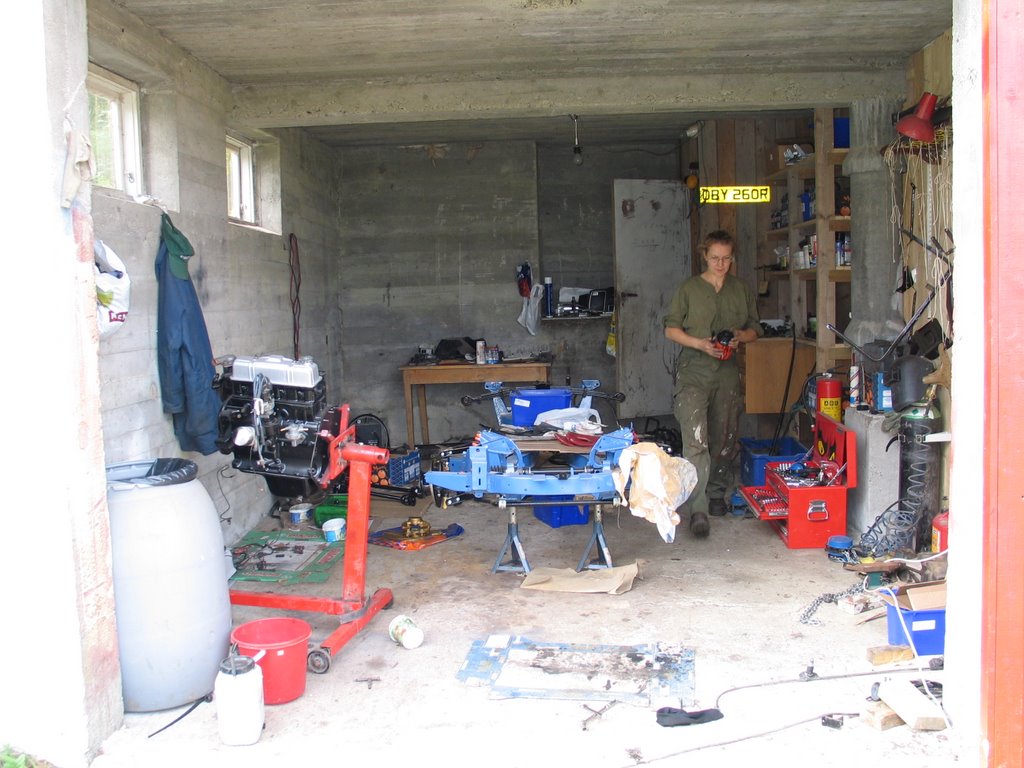
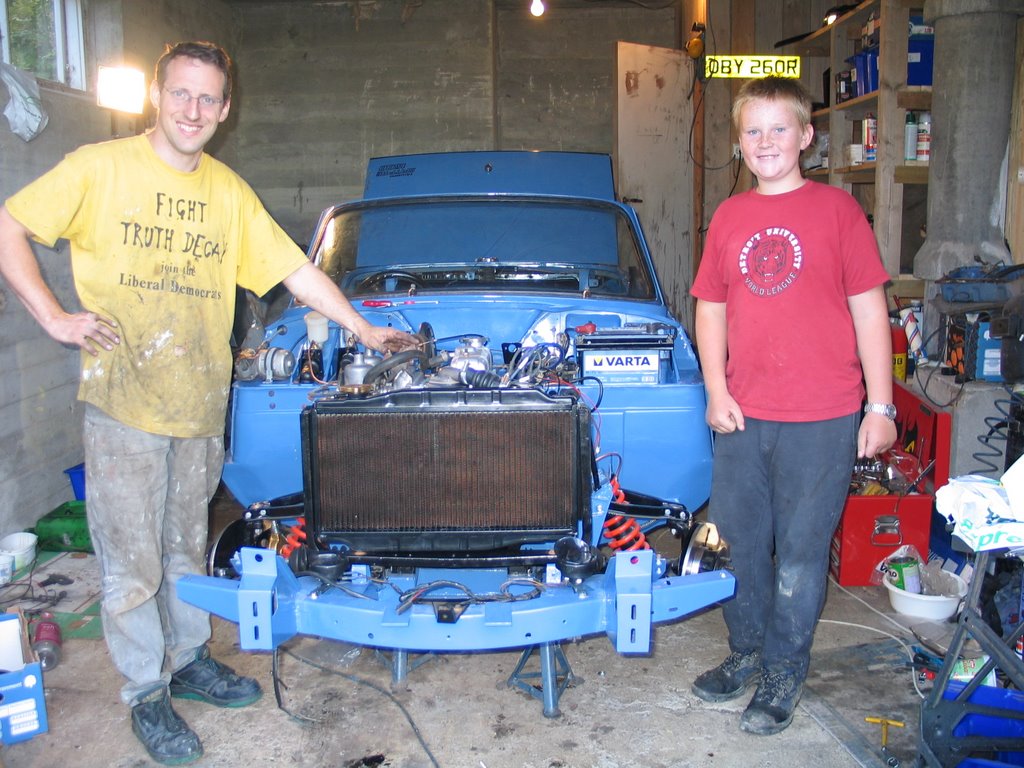
Around 5 p.m. the engine turned over for the first time in 8 years, but as with all other jobs starting it wasn't totally straight forward due to a blocked outlet valve in the fuel pump. Once this was fixed, to great rejoicing the engine started as soon as petrol got to the twin SU carbs. The occasion warrented the first photo shoot of the day.

If you look closely you can see the fan spinning just above the top of the radiator....
After this momentous occasion spirits were lifted slightly and we set about the remaining tasks of sorting out brakes and installing seats, in otherwords the bare essentials for the first outing. Having sucessfully bled the clutch with the assistance of one of the neighbours lads, Mari was left in charge of bleeding the brakes. This was one of the few jobs that went surprisingly well and quickly. In the meantime I got the seats installed and by 10p.m. we were out on the lane guided by very dim torch light. No speed records were broken and we were far from finished but there was satisfaction that we had managed to get the main major functions more or less in order and there was light at the end of the tunnel. We went to bed naturally disappointed but all the same with a great feeling of achievement.
Our test was booked for Thursday 17th August, with a 2 month waiting list you have to book in advance. I'll pick up the story on the Saturday before the big day.
Bodywork wise, the situation looked like this

The underside had been primed, painted with a stone chip protective layer and then painted with the blue 2x top coat. The inside was primed and I had started some filling/prep on the outer panels.
Mechanically it was as below,
pretty much as per the previous post but all rear suspension components were more or less ready to install and the engine work was also pretty much completed.
Body wise, I arranged some "hired help" for the Sunday and the Monday evening, 2 guys well experienced with body work and prep so by the Tuesday morning the body looked like this,

ready for painting.
In the mean time my wife cleaned the gearbox

and I reconstructed the rear suspension, complete with new wheel bearings which were changed by a local garage as I don't posess a press.

Tuesday was a frustrating day, the high build primer which was supposed to be on the body by 10 o'clock wouldn't flow from the gun and the compressor I had couldn't keep up. More details of the nightmare I had painting can be found here on The Club Triumph Forum. In the end, again way behind the days plan, I got it all painted with the primer and looking pretty good.

During the few hours the primer needed to harden I got the chassis on 4 wheels for the first time and with some help drafted in we got the engine and box hoisted up, rolled the chassis under and dropped them into place. One job that went well.

I then installed the propshaft and by the time that was completed we were ready to start flatting the body work, this went relatively quickly and with 2 compressors joined together spraying the top coat went relatively well, although finishing at nearly 1 o'clock in the morning was far from Ideal.
Bright and breezy the next morning (Wednesday, 26 hours before the car needed to be road worthy...) we were all ready to re-unite the body with the chassis, which we wheeled out in the sunshine,

so that we could wheel the newly painted body on it's trolley into the garage.

We carefully attached the body to the ceiling and using the 2 chain blocks I had borrowed from work raised it up off the body trolley and high enough to wheel the chassis back under. This whole procedure went well and remarkably enough, all the neccessary holes in the body lined up with the captive nuts in the chassis. Seems we achieved something during all those drunken weekends in my old garage in Cockermouth...

At this point, the photos dry up and about 14 hours of frantic bolting back together ensued. I had assistance during the evening and into the early hours from a mate, and despite extreme tiredness good progress was made. Whether the tiredness and late hour was a factor in the cracking of the old windscreen during installation is a point for discussion.
Not wanting to accept the inevitable truth that the car was not going to be driveble by 10 a.m. the next morning and ever the optimists it was back out of bed at 5:30 am, less than 4 hours after we had hit the sack. Everything continued to take more time than expected and the deadline came and went. However, out of pure stubbourness we were still going to drive the car on the same day.
Around 5 p.m. the engine turned over for the first time in 8 years, but as with all other jobs starting it wasn't totally straight forward due to a blocked outlet valve in the fuel pump. Once this was fixed, to great rejoicing the engine started as soon as petrol got to the twin SU carbs. The occasion warrented the first photo shoot of the day.
If you look closely you can see the fan spinning just above the top of the radiator....
After this momentous occasion spirits were lifted slightly and we set about the remaining tasks of sorting out brakes and installing seats, in otherwords the bare essentials for the first outing. Having sucessfully bled the clutch with the assistance of one of the neighbours lads, Mari was left in charge of bleeding the brakes. This was one of the few jobs that went surprisingly well and quickly. In the meantime I got the seats installed and by 10p.m. we were out on the lane guided by very dim torch light. No speed records were broken and we were far from finished but there was satisfaction that we had managed to get the main major functions more or less in order and there was light at the end of the tunnel. We went to bed naturally disappointed but all the same with a great feeling of achievement.
Subscribe to:
Posts (Atom)